

Adventures in Quilt-As-You-Go
- Tara Wright
- Jan 11, 2021
- 3 min read

I recently finished a king-size Carpenter Star quilt that I made in a hybrid style of quilt-as-you-go. I wanted to share some things I learned.
What is Quilt-As-You-Go?
Quilt-as-you-go (hereafter referred to as QAYG) is a great method to learn of you want to make quilts entirely by yourself (no longarm quilter) and if you want to make it all on your domestic machine.
The original style of QAYG that I learned was similar to foundation piecing. You cut out oversized batting and backing pieces and make your block directly onto them for a stitch-in-the-ditch look on the back. Or you could piece the block onto the batting only and add the back later. You can add the backing by block for quilting in your desired motif and then join with sashing, or finish your entire top, add the backing as a whole, and do minimal quilting along block lines or hand-tie.
The next way I learned to QAYG was to piece the blocks first, and then quilt onto the batting or batting and backing. This method is allows you to do more intricate quilting on your blocks, and is a great way to do sampler style walking-foot or free-motion quilting as practice. And there are several joining styles. I love the books by Jera Brandvig at www.quiltingintherain.com or also at several retailers including Amazon.
My hybrid version of QAYG
The way that I made this quilt is a hybrid because I pieced my blocks in sections since they were roughly 20" x 24" and then completed the block piecing directly on the batting only.
What I learned - Pressing is very important because there is not as much as give to match your seams if you have piecing issues.


Next I joined 4 blocks (with batting) to make my rows. My seams are pressed open and batting is trimmed at the ends only to reduce bulk. At this point I added the backing in strips. It is pretty easy to baste these and then quilt them with no puckers - YAY!
What I learned - Make sure that your backing fabric choice is dark enough to not show your front fabric seams! I had some dark blues on the front and my lightest taupe did not hide the color all the way - major bummer!


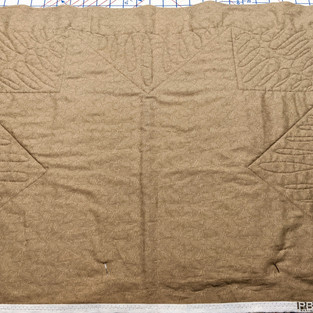
Now you need to pick your quilting motif with some thought since you will be joining your pieces after quilting. As long as there is enough going on or your straight lines are very accurately measured then it really doesn't cause a problem.
Next I added my label (while the quilt was small), and then I joined the rows together.
What I learned - Take special care and USE PINS to match all of your seams! It is not as easy to feel them as you sew, so I highly recommend matching everything up and pinning. And make sure your 1/4" seam is accurate!


At this point you have an almost finished quilt - YIPPEE! The last steps are covering the row seams and putting on your binding. To cover the seams from joining the rows, I made 2" strips in matching backing fabric and basically made a double-fold binding strips. This means I pressed the fabric in half (wrong sides together) and then opened it up and re-pressed each side to that center line. Attaching it was easy, just center it on your open seams, pin and stitch it down on each side about 1/8" from the edge. Make sure you choose thread colors that will match well for each side. Then add your binding and call it a day!
What I learned - This method of covering the strips was easier than doing a single-fold type binding and attaching one side when you join the rows and then folding it over (like binding) and then sewing the second side down. I didn't like that method because my seam was more bulky feeling since it was not open. Normally don't like open seams, but it works well for this application.


I hope this helps answer some questions about quilt-as-you-go. If you have other things you'd like to know, please ask (or comment) below, I'd love to hear from you!
Be blessed my friends!
Tara


Comments