

How to Bind a Quilt with your Sewing Machine
- Tara Wright
- Oct 3, 2022
- 5 min read
Updated: Feb 15
Do you have a stack of quilty goodness that needs finishing? Many people love to finish their quilts with hand-stitching, but honestly I don't have the time. So I do it all with my machine - and all you need is a simple straight stitch!

Binding your quilt is the finishing touch! It keeps all your layers enclosed and stitches over all those unlocked quilting stitches you were worried about unraveling. This tutorial is focused on the double-fold method with mitered corners and an enclosed end. There are other methods including self-binding (or pillowcase binding), prairie point, single fold, and making a continuous strip to join the ends. You can also add embellishments into the binding like a flange, ric-rac, pom-poms, lace and other ephemera, but today we are focusing on simple binding and a simple label for posterity.
The process looks like this:
Determine the number of strips needed and cut them out,
Join them together into one long strip and press,
Attach the binding to the front,
Tuck in a label,
Attach binding to the back.
To some binding is a chore, but you can make it fun by choosing an interesting fabric as the "frame" for your quilt like stripes, dots, and funky prints. Also, the knowledge that as soon as your done you can USE your quilt can be quite motivating!
Let's Get Started
Since this is a general tutorial post and not linked to a specific quilt, you need to look at your pattern or follow the downloadable instructions for determining the number of strips you need to cut.
Click on the link below to download and/or print it:
TIP: If your needed length/quilt perimeter is very close to the combined length of the strips, I always add an extra strip. For example, a 50" square quilt has a perimeter of 200", and 5 strips will have a length of 200"-210", so I would add a 6th strip just to be safe.
**The Nothing but Love Quilt = 7 strips and the Streamers Quilt = 6 strips
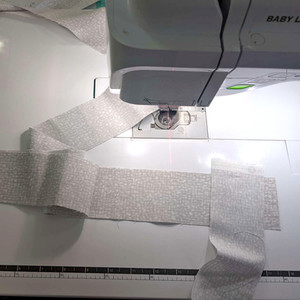
Once your strips are cut, sew them together. You can sew them with straight seams (end-to-end), but I prefer to sew them together at an angle (or bias joint) because it looks nicer and it causes there to be less bulk when attaching it.


This technique is described on the guide sheet in detail. You can also accomplish this quickly with chain-piecing because the fabric strips are long enough to sew on the end of the same strip you just attached.


Getting Attached - to the Front
Once you have sewn the strips together, you can press them in half with the right side facing out. As you become more experienced with this process you may choose to skip the pressing and just fold the fabric in half as you go.
I like to clip my binding into place and finesse the corners before I start sewing, however this can also be done as you sew if you prefer. We are attaching the binding to the front side of your quilt so that any issues will be less obvious on the back. Use a straight stitch and sew a 1/4" away from the raw edges of your quilt and both raw edges of the binding strip (laid on top of the quilt).


The guide describes how to fold the fabric to miter the corners (shown above as well), and in the video below I show you how I do this when I clip and then adjust it when I sew. It can be a little hard to describe. It is most important to lock your stitches at the start and stop of every corner, and not to sew the little corner flap or it will lose all movement for folding over the corner. If you have questions, you can ask me in the comments or almost live by using the "Let's Chat" button.
Join the Ends - The Easy Way
Once you have sewn your binding around the entire quilt front and your almost back to the start of your strip, you need to stop and address the end because the raw edges need to be enclosed somehow.
I like to simply open up the tail you left at the start of your strip, tuck the ending tail inside, and keep on sewing. It is simple and looks perfectly fine. In the video below, I demonstrate two ways you can fold the starting tail which needs to be folded to secure its raw edges. The first way results in a straight edge and the second gives you an angled edge (similar to the angled joints thought the strip).
Choose your preference and finish attaching the binding strip to the front. Don't forget to run over your beginning stitches a little and then reverse so all your stitches are locked.
Attaching the Binding to the Back...from the Front
Next you have some pressing to do (as only outlined in the guide sheet) to help your binding finish neatly. If you skip the pressing it can result in some wonky folding and lead to skipped areas when attaching the back.
Finesse the corners (demonstrated in the video below) so that you have that nice miter fold in your corner and your folded fabric edges meet up on the back side. Sometimes it overlaps a little which is ok, just don't let there be a gap between the edges. When you fold the binding over you should be covering the stitches from attaching the binding to the front. Clip or pin it in place and then look at your threads.
Your top thread will be stitching in the ditch on the quilt top, but the bobbin thread will be stitching on top of your binding. Change the thread colors as needed.
**If you are going to attach a label, the easiest way is to tuck it in now (and pin it) under the back binding usually near a bottom corner. This is discussed in the next section.
Then lay your quilt back into position with the top up, you will hide the stitches in the ditch, but create lovely topstitching on the back binding. You only need to lock your start/stop stitches.
Why Labeling your Quilt is Important

I try to label all of my large quilt projects and any repairs I do for people. This is not really for you the quilt maker, but for posterity and your loved ones who may receive this quilt. There is a concerted effort in the quilting community (especially historians) to get quilters to label their quilts simply to record the name and date of the quilt because your quilt may live long after you and nobody will know its true story. I also try to include fabrics and pattern used just in case it needs repair or companion items.

There are many ways to get quilt labels, just do an internet search and you can find all kinds of personalized quilt labels. There is an awesome subscription by www.sweetwaterco.com (seen at right) for personalized labels too.

I like to make my labels. I have handwritten them on fabric with Pigma pens (sold at any craft store), but now I computer print them with printable fabric or iron-on fabric transfer paper.
I print it out according to directions and either put it on a piece of fabric and then sew it on by hand. I also like to put them on a folded square and tuck them into the corner so that the raw edges are under the binding.


And now you have a finished quilted ready for gifting or use - Enjoy!
I love to see your work! Share your progress on social media by tagging me @polkadotpeepquiltsetc on Instagram or Facebook. Follow me on either platform for more quilty fun or sometimes cooking, family adventures, or other tidbits.
Until next time - Be blessed my friends,
Tara


Comments