

Let's Make the Streamers & Confetti Quilt
- Tara Wright
- Sep 30, 2022
- 4 min read
Updated: Nov 17, 2023
Hi y'all! This is a fun and quick quilt that is made using improvisational piecing. I introduced it and provided the FREE pattern for National Jelly Roll Day 2022. I want to follow up with some visuals to assist in making this quilt in case you've never made a quilt using this technique.

The Improvisational Piecing technique just means you have choices in much of the measuring and cutting, along with the colors and prints. I do not dictate the length of the streamers nor the number of confetti pieces in your quilt - it is truly UNIQUE!
If you are ready for new quilting adventure and a fast finish, click on the link below to download and/or print the pattern:
I hope this is a FUN opportunity to make a quilt in a day and learn a new technique.
Gather your Materials
The first step is picking your fabrics - YAY - Super fun!!
I choose 2 jelly rolls for less thinking about color and print coordination, but you can certainly sew from your stash and cut your own 2.5" strips. You need 30 color strips for the quilt, 6 color strips for the binding, and 15 strips for the background.

There are so many options, but if you want to go thematic (for a holiday) here is some inspiration:


Start the Improv - Making Streamers
If you are a seasoned quilter this next part may come as a shock to your system, and if you are a new quilter this may sound scary, but...I do not decide the size of your streamers!

Step 1: Cut 60 pieces from your background strips that measure anywhere from 3.5" to 8" long. If you want to be precise than pick an increment and cut them in groups since 30 is an easily divisible number. For example, cut 20 - 4" strips, 20 - 6" strips, and 20 - 8" strips. Or you can cut groups of 10 or groups of 5, it doesn't matter as long as you have 60 pieces.

Step 2: Get your strips ready to sew, so put them in order OR let them be random.
Step 3: Sew the background pieces onto BOTH ends of the 30 color strips using the bias joining method (also referred to as angled joint or binding joint). You can do them all the same direction OR change the angle direction by making your background piece go up instead of down when you sew.


TIP - I like to use white-on-white or blender prints for the background, but make sure they are facing the right way when you sew them together OR make it easy on yourself and go with a solid!
Step 4: After all the strips are sewn to the background and pressed, it's time to trim. Make your left set (12.5") and right set (30.5") according to the pattern.


Step 5: Now sew them into matching sections of 5-8 strips.
TIP - Make sure your left section has the background on the LEFT and the right section has the background on the RIGHT and sew them in the same order. (Don't ask me how I know this could be an issue - LOL!)

Kick it into High Gear - Making Confetti
So you have pieces of color strip and background strips left over right? Well instead of these going in the trash or back into your stash, we are using these little bits to make the confetti.

This is where the improvisation really kicks in! Your mission is to make 30 -10.5" strips with these leftover pieces. I only provide guidance in the pattern, but there is NO set way to make them except to use straight seams.
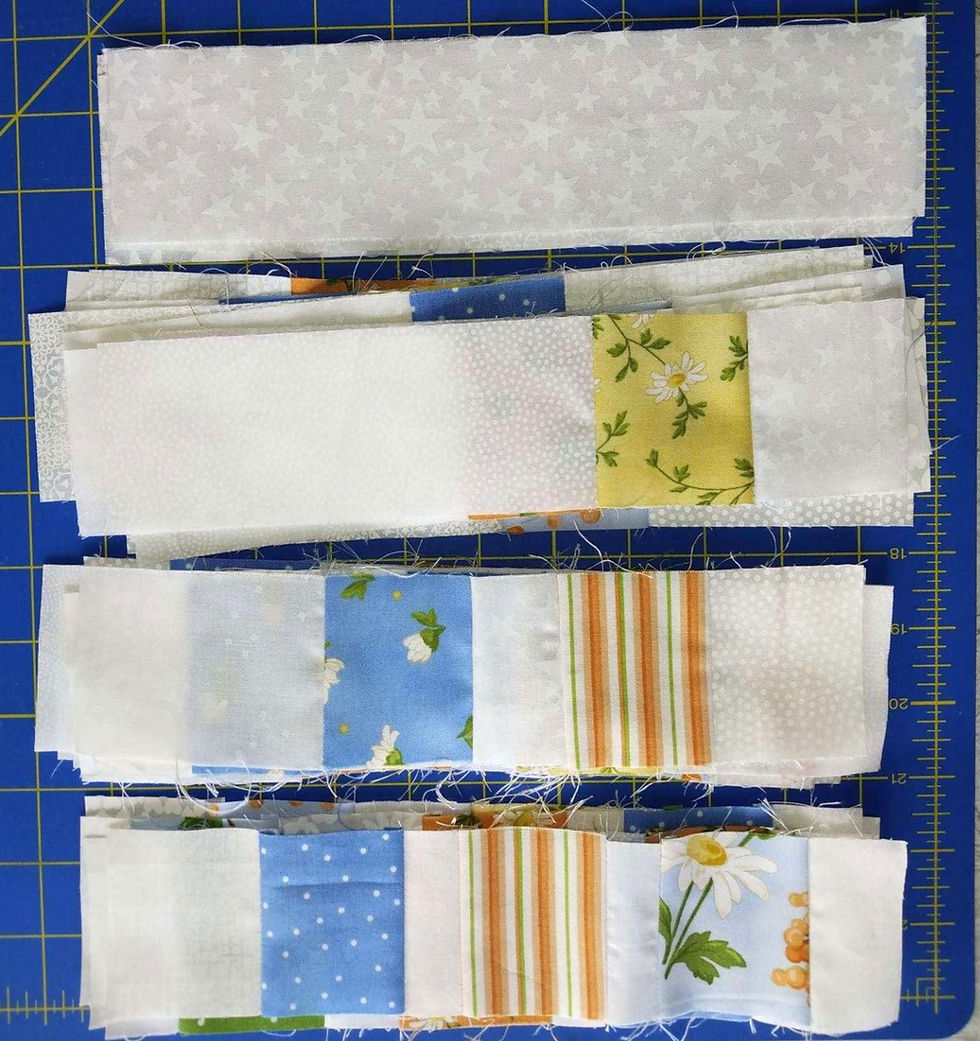
If this drives you crazy, there are some options - for example (as shown) I make some blanks, some with 1 pieces, some two-fers, and a few with 3 pieces. Three is a little crowded but do-able, but no more than that UNLESS you make your confetti pieces skinnier (mine are all made with 2.5" confetti squares).
If you want to make them very precisely and measured and centered (not random), then here is my help for you:
Blank = 1 x 10.5" background strip
One Confetti Piece = 1 x 2.5" color piece and 2 x 4.5" background pieces
Two Confetti Piece = 2 x 2.5" color pieces and 3 x 2.5" background pieces
Three Confetti Piece = 3 x 2.5" color pieces and 4 x 1.5" background pieces
Here's a little video of the process:
After you make all 30 pieces, then sew them into sections that match in size (# of strips) to your streamer sections. Your sections can be made with your confetti pieces in any order as long as it is pleasing to your eye.

SEW-BAM-BOOM!
All your sections are made and now it's time to put them together to finish your quilt! All of the hard part is over, now it is time to sew your left sides to the confetti (middle) sections, and then sew on the right sides to each section.
Once each section is complete and pressed, then sew your sections together, match those seams for the confetti section, and your quilt top is finished! Yahoo!


I sincerely hope you enjoyed making your Streamers & Confetti quilt, and I didn't hurt your brain too much! (LOL)
Share with your quilt with me using #streamersquilt or tag me @polkadotpeepquiltsetc on Instagram or Facebook (or here in the comments) - I'd totally LOVE to see your version and give you a big applause!!
Until next time...
Have a great day & Be blessed my friends!
Tara


Comments