

Nothing but Love Quilt Along - Joyful
- Tara Wright
- Feb 13, 2022
- 4 min read
Updated: Feb 28, 2022

Happy Monday! It's time to meet JOYFUL - Block #3 in the Nothing but Love Quilt-Along. This block uses straightforward, simple piecing to create a pretty basketful of heart-shaped flowers - a perfect bouquet for Valentine's Day!
Why Joyful? Most importantly love should bring much joy to your life on a daily basis. You may also have noticed that each block is a traditional block with an injection of love. So when I designed this block, I saw in my brain a young girl exuberantly tossing flowers in the air from her basket - certainly a picture of joy!
The Block Pattern

One of the great things about this block is the opportunities to vary the fabric placement. In the original version, I reversed my usual pale background and used the red fabrics. That can really provide punch to your quilt and keep your eyes moving around and interested in each block. I also had a bunch of prints for the flowers, so I used six different patterns. However, in my new block there are fewer prints, so it provides more of a challenge to diversify each flower so you can see them. Fill your eyes with joy and have fun playing with your fabrics and deciding where to put each one, and if you decide to add a few fabrics, I won't tell!
*Please note that half-square triangles (the basket) are a trickier place to use linear and directional fabrics, so if you choose to use them pay close attention when making the two sizes if you want the fabrics to go in the same direction.


Let's make a joyful sewing noise and make Block #3 - download the pattern below:
If you have any questions or issues with downloading please ask here or on the contact page.
Making the Joyful Block - Tips and Tutorial
These tips and photos are intended to be an additional resource to the printed pattern. I am especially trying to give information for new quilters, so if you are a seasoned quilter and have additional insights - please share in the comments!

The first step is always cutting your fabrics and organizing the pieces. It is very helpful to have a labeling marker. I simply wrote letters on a strip of paper and cut them out, but they do make all kinds of stickers, pins, beads, and other fun notions for this purpose.

Let's make the flowers:
Chain piece all of your A and B blocks. This means to stitch them together one right after the other without cutting the thread. This conserves thread, saves time, and helps prevent your little fabric bits from getting sucked into your feed dogs.
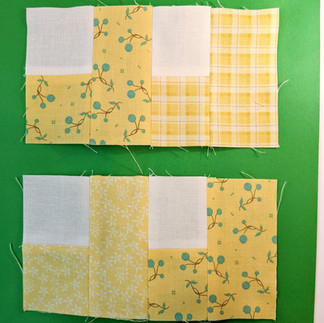
Cut them apart and orient your new little rectangle. After you press make sure the background fabric is on TOP, and then put the C block on the right.
You can then chain piece all the C blocks onto your A/B patch. Quick right?
Now onto the Half-Square Triangles!
You may see some similarities to the Stitch and Flip method here because we are again marking diagonal lines. So after you have marked with your new favorite marking tool, sew 1/4" away from the marked line on each side.

It's a little hard to see, but my "marked line" was just pressed in with the iron, but you can see I put my quarter inch guide (the little black thing on my presser foot) right on the ironed line. Then you can see my red laser line (which is where my needle will go) is 1/4" away from the center line.
After sewing on both sides, you will cut on the center marked line and press. Now I try to make my half-square triangles (HSTs) pretty accurate, but they should always be checked and trimmed. I use a 6.5" square ruler from Creative Grids (that I love) for this. When trimming (or squaring up) an HST you want to keep the seam as the diagonal line in the center of the block. Many rulers have that handy diagonal line on them, so you just line it up and trim to the desired size (in this case 6.5") with your rotary cutter. *FYI you only need one of the large HSTs.

To finish making the block, sew your little patches into quadrants (4 sections).
ONE


TWO (and THREE = oriented differently)


FOUR is the big Half-Square Triangle.

Then sew the quadrants together to finish your block! Voila!
I hope you have a lovely day AND don't forget that it is so much more fun when you share your progress here on the blog, Instagram, or Facebook. Please use the hashtags #nothingbutloveQAL #affectionblk or tag me @polkadotpeepquiltsetc so I can find them.
There are link buttons to my Instagram and Facebook at the bottom of every page on my website.
You can also sign up and join my community here on Wix (or the Wix Spaces app).
Next week I will be discussing and demonstrating the SQUIGGLES quilting motif.
Here is the quilt along schedule (with links for you to catch up anytime):
Nothing but Love Schedule
December 20, 2021 - Quilt Along Intro & Details
January 10, 2022 – Get Ready: Prep the Fabrics & Batting
January 17 – Affection
January 31 – Refuge
February 14 – Joyful
February 28 – Adoration
March 14 – Devotion
March 28 – Inspiration
April 11 – Besotted
April 25 – Admiration
May 9 – Infatuation
May 23 – Faithful
June 6 – Smitten
June 20 – Cherish
July 4 – Patience
July 18 – Comfort
August 1 – Grateful
August 15 –Hopeful
August 29 – Enamored
September 12 - Sashing It All Together & Finishing Details
**Each “between block” Monday there will be a post for quilting the blocks:
January 24, February 7 & 21, March 7 & 21, April 4 & 18, May 2 & 16 & 30, June 13 & 27, July 11 & 25, August 8 & 22, September 5
Have fun making your blocks - I can't wait to see!
Fill your day with Joy & be blessed my friends,
Tara


Comments